

NNT has integrated its award-winning Change Tracker™ Gen7 R2 with QRadar to enable a closed-loop environment for change management. This will allow you to validate all of the approved and authorized changes with a full audit trail of what actually changed and reconciled with the Change Request(s).
This really simplifies the security risk and exposure as you will be able to identify emerging threats from the data collected. Learn more about this integration by visiting our QRadar Integration Webpage
Steps to Integrate Change Tracker™ Gen7 R2 with QRadar
1. Please download the Certified NNT App on the IBM App Exchange
You can find our IBM Validated NNT App on the IBM QRadar App Exchange which is fully certified for use, please navigate to the following website to download it: https://exchange.xforce.ibmcloud.com/hub/extension/156bb35041924eace38c32f70edb36fa

2. Upload the downloaded NNT App to QRadar
Once you have the Change Tracker QRadar App downloaded, please log into the admin console of your QRadar instance and select Extensions Management.
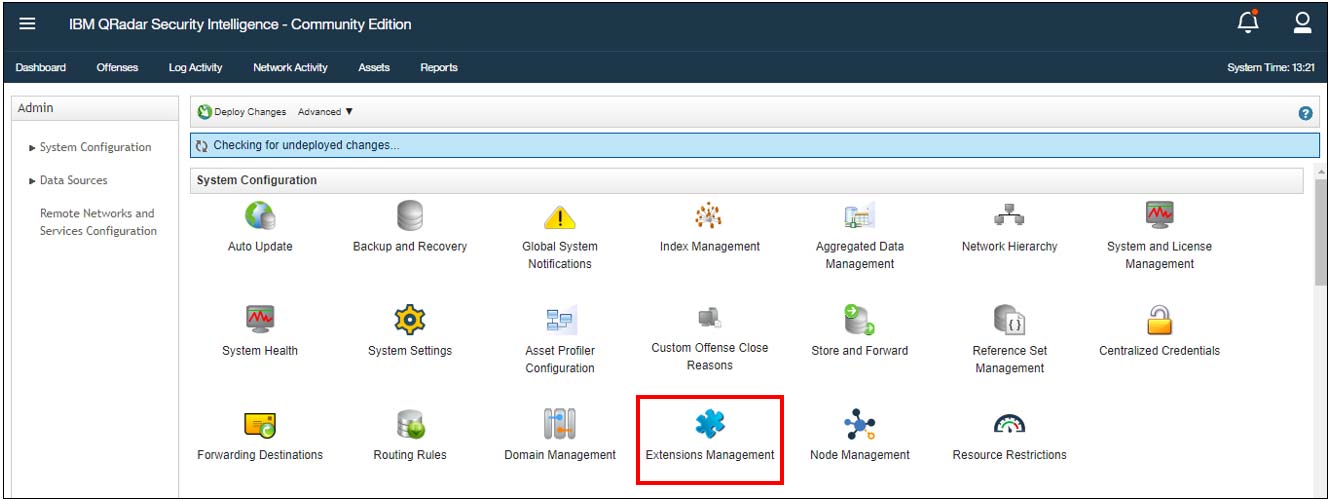
The Extensions Management pop up screen will be presented and from here you will be able to select the Add button.

Once the Add button has been selected, please browse to the location you have saved the NNT Change Tracker QRadar App to and select it.

3. Configuring the QRadar Log Source
The Next step is to add your NNT Change Tracker Hub as a QRadar Log Source. Please navigate into the admin console of your QRadar instance and select Log Sources.

This will launch the Log Source pop up box, please select the Add button.

Once you have selected the Add button, the configuration menu will launch. Please follow suit with the information below:

4. Deploying the Changes
On the admin console of your QRadar instance, please make sure you deploy your updated configuration to complete the QRadar Setup stage.

5. Configuring the Change Tracker Gen7 R2 Console
On the Change Tracker Gen7 R2 Console, please navigate into the Settings > System Settings page and edit the Syslog Server section to include the QRadar servers’ details.
NOTE: The NNT Change Tracker QRadar app requires Common Event Format (CEF) log messages, so please ensure that Syslog version is selected.

Now that the Syslog Server section has been configured, the final step is to configure a Change Tracker notification policy to specify which events are sent to QRadar. Please navigate into Settings > User Notifications and + Add a new notification. In the example below, I have created a new Syslog notification to send all unplanned changes and device offline activity from my Windows groups of devices to the QRadar Server.
Please note that the notifications are highly granular, covering all tracker alerts, plus information and audit trails for admin tasks. A list of the different alerts can be seen under notification types.

6. Checkout/Test Procedure
The checkout/test procedure is to generate some sample events and ensure they are received and parsed correctly. On QRadar, use a filter to isolate NNT Events only and ensure the information received is displaying correctly. Please view the screenshot below:

As you can see, all of the events specified for Syslog notifications are being parsed clearly by the NNT Change Tracker Extension.

The above confirms that the IBM QRadar server is now fully enabled for NNT’s SecureOps strategy!
Learn more about our SecureOps Strategy:
Security Through System Integrity
Closed-Loop Intelligent Change Control
Continuous Compliance & Assurance


 New Net Technologies (NNT) is now part of Netwrix